How to install an Empeg into a Nissan 300ZX Twin Turbo
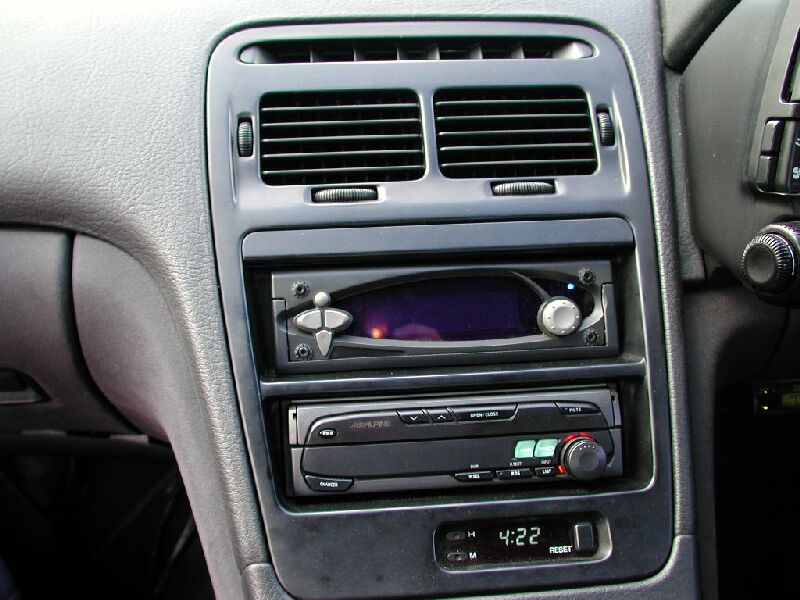
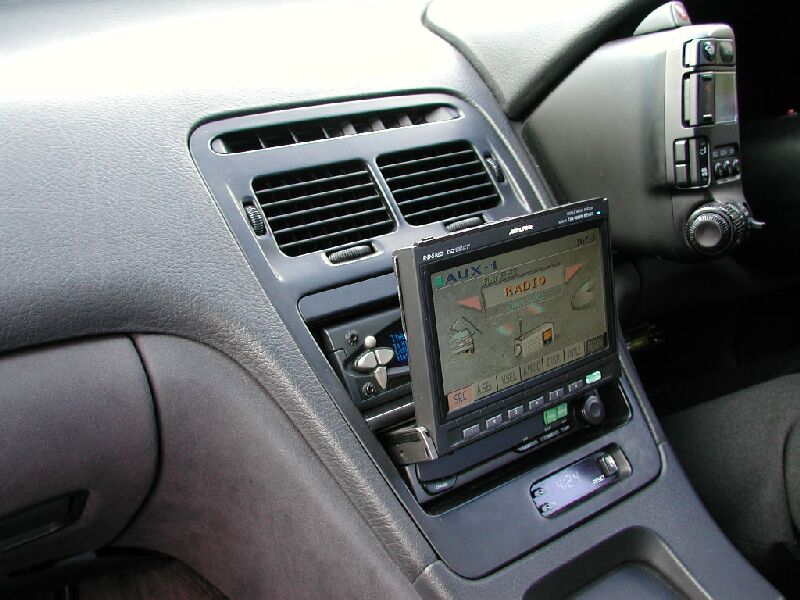
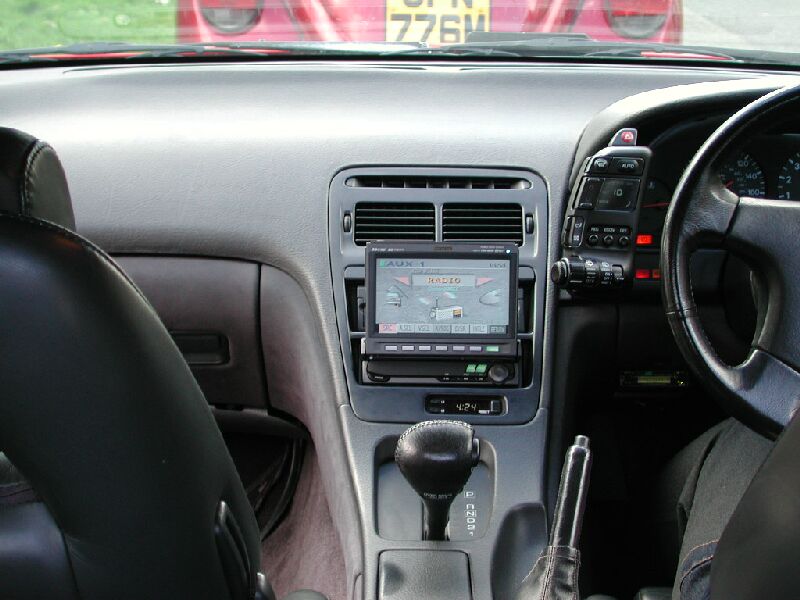
The first thing to point out is that, although you have dual-din slots, you really have no choice about which slot to use for the Empeg. The lower slot is simply too small for the Empeg cage (internally) and the Empeg's fascia (externally). The only way around this (if you really must have it in the lower slot) is to seriously rework the fascia of the car. This was something that I wasn't prepared to do, even though I have a widescreen headunit in the bottom slot which now obscures the Empeg in the top DIN slot when the screen is opened.
To remove the fascia from the car, remove the strip that runs along the top DIN slot. This is held in by some spring clips which can be levered out with a
screwdriver. Behind this strip are two screws: remove them. There are 2 more screws which are hidden in the top air vent of the fascia (the narrow vent).
To get to these screws, carefully prise off the screw covers at either side of the vent with a small flat blade screwdriver. Once exposed, remove these two screws. The fascia is held in place by a series of clips which should snap free when you try to (gently) pull the fascia off. Once the fascia is free from the dash, unclip the lead going to the clock to fully release the fascia. Put the fascia out of the way so it doesn't get damaged while you are working.
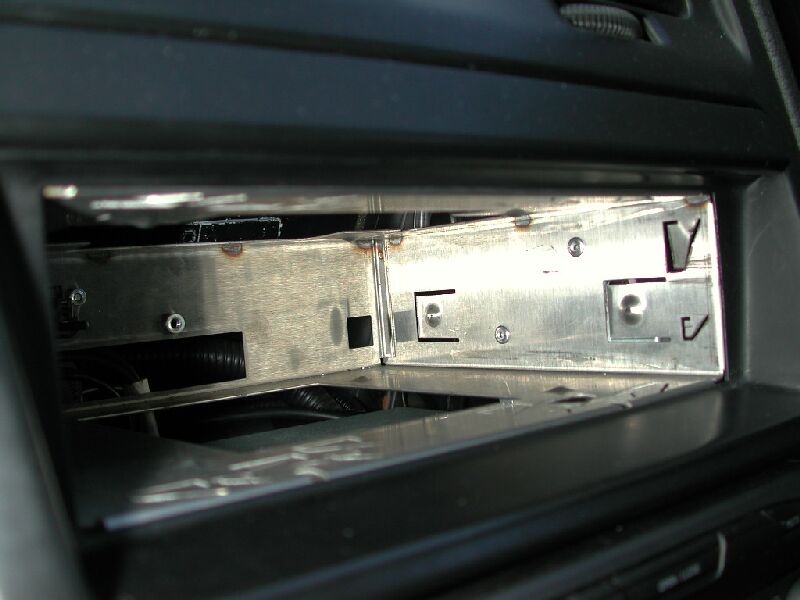
The framework that holds your head units in the fascia comprises two separate metal brackets which screw to either side of the headunits and also to the car frame. Remove the framework from the car with the stock headunits. Putting the Empeg cage between the brackets (in line with the top DIN slot) will make the bottom edge of the brackets splay out slightly and it will not fit nicely when re-installed with another unit in the bottom slot. This is due to the fact that the empeg cage is slightly wider than a DIN unit, since it is designed to contain a sliding DIN unit. To get around this, some spacers (we used 1mm plate washers with a suitable centre diameter for the screw holes) will be needed for the headunit on the bottom position, but that will come later.
Each stock bracket will have two pairs of countersunk screw holes facing inwards. The upper pair are used to secure the top headunit, and the lower pair the bottom unit.The countersink will need to be filed/ground off on the inside of the bracket in order to fit the bracket flat against the Empeg cage (this only needs to be done on the top holes where the Empeg will be fitted). Once this has been done, position a headunit in the lower position of the bracket and refit the securing screws with the spacers between the bracket and the unit. This stops the brackets splaying apart. Put the framework with the headunit back into the dash, secure it loosely to the console with the frame screws and push the Empeg cage between the brackets roughly positioned in the area where the top slot is. Put the fascia back onto the console and manipulate the position of the Empeg cage through the facia so that it is correctly aligned exactly where you want it to be in the final installation. Use a scriber to score the location of the Empeg cage onto the brackets which will be used as a reference for drilling holes later. Remove the fascia again and make some more score marks if necessary. Once you are happy you can exactly pinpoint the location of the cage in relation to the brackets, remove the Empeg cage and other headunit from the framework and prepare for drilling!
Take each side bracket in turn and put it against the appropriate side of the Empeg cage, matching it up to the score marks produced earlier. Choose 2 locations on the bracket, nicely spaced from each other, for places to drill holes through the bracket and cage. Once two places have been chosen and marked on each bracket, the drilling can begin. Start by drilling the bracket where you have marked the 2 drill hole locations. Drilling the bracket is fairly straight forward, since it is mild steel. It is best to use a sharp nail or punch to make an impression on each mark to make sure the drill does not stray. The choice of the drill size depends on the type of pop rivets you have chosen to use to hold the brackets to the Empeg cage: we used 3.1 mm, short reach (4mm) pop rivets.
Once you have made 2 holes on each bracket, put the brackets against the Empeg cage once more and as before, match up using the score marks made earlier. Get someone else to hold the cage and bracket firmly whilst you drill through the Empeg cage using the holes you have already made in the bracket as a guide. The Empeg cage is made of stainless steel and so can be pretty tough to get through but with a decent drill bit, it can be done. To make drilling easier and prevent the drill bit burning out, you can use a drop of lightweight machine oil in the hole before starting. Repeat the drilling for the two holes on the other side of the Empeg cage using the bracket for that side.
Once you have made the holes in the cage and brackets, they can now be secured together with rivets. Position the rivetter on the inside of the Empeg cage and rivet outwards through the cage into the bracket. Do this for all 4 holes. You can file down the protruding outer ends of the rivets afterwards if you think they will stop the framework fitting back in the car. Check that the empeg will slide nicely into the cage and does not snag on the (almost flush) rivet heads. File down where necessary, but not too much! We found that there was ample clearance and this was not needed.
Slide the second headunit (for the bottom DIN slot) into position between the brackets and re-assemble using the spacers to make the bracket fit flush to the headunit and the Empeg cage. You should now have a sturdy, semi-permanent framework with parallel side brackets that can be re-mounted in the console with the framework screws. Re-fit the fascia and check that the empeg does slide correctly in and out of the sled through the DIN slot aperture.
Now, remove the fascia and do any wiring you need to do to the Empeg cage. This will vary greatly depending on your setup so I won't say anything more about this - it is fairly straightforward. If you are not sure about this part of the installation, post here on the BBS with your questions.
Fit the Empeg cage/bracket/headunit back into the car. Screw it all in and replace the fascia (don't forget to connect the clock lead to the fascia
before putting it back). Replace the screws in the fascia and put the screw covers and screw strip back in place. That's it! You should have a perfectly
aligned Empeg cage which will be rock solid thanks to the rivets. The whole thing can be done in an afternoon. It certainly helps to have 2 people on this one.
At this point, I would like to thank Rob Schofield for his help in fitting the unit. Thanks to his generous offer and large toolkit, I was able to finally fit the unit after a many months of investigating. If you need any advice on fitting an Empeg into a 300ZX, please get in touch with either Rob (schofiel) or myself (Andrew). Now, I'll leave you to enjoy the pictures (attached)!
Happy Empeg'ing.
Andy
26GB MKII Blue #090000727
_________________________
26GB MKII Blue #090000727


 Previous Topic
 Index
Index